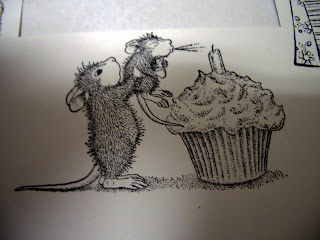
Sorry about the poor quality of this image, I am getting the hang of the camera. One of my favorite things about HM (House Mouse) stamps is the fact that the shadow is already shaded. We will use our darker copic for where the black is heaviest, giving us an easy way to learn how shading works.
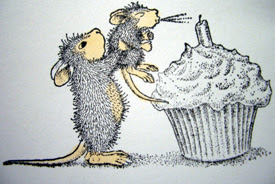
I began by using EOO and R20 for the mice. I just hinted at their checks with the R20 while steadily making their limbs E00 with just a tinch of R20 for shading. Below you will see my formula for these mice.
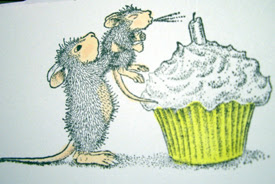
My all time favorite yellow combo is Y13 and Y15. I think it is a great 'pop' color. Again I used the Y13 over the whole image, then I 'shadowed' with Y15.

Frosting is always fun, and in this particular stamp the key to making a boy or a girl card. Betcha never though frosting could set a mood! I used B14, then B05 and made my darker shadows with BG09. Next I used my colorless blender to smooth out the color from the BG09 (you can see the realization of this below).
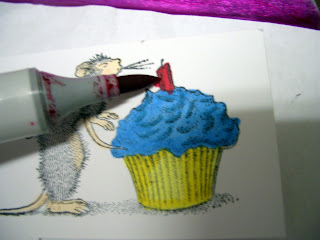
This candle is quick and I used R27 and R29. If you look closely you can see that I made a mistake coloring the side of it and went out of the lines (I actually did this while trying to balance the clipboard, marker and my camera. Typical!) Tomorrow, I am going to show you a quick way of fixing this common mistake.

Next, I went back and shaded the wrapper a little more with Y17. Extra layers of the same color can really add umph without costing big $$.
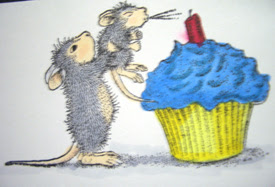
You can see my mistake starting to fade with my trick (TBAT to be explained tomorrow). You can also see the first layer of C1 on the mice.
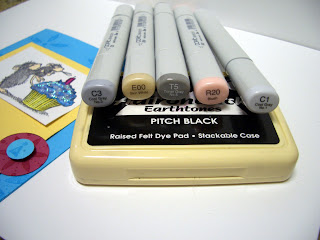 I have about 4 or 5 color combos that I like to do with these mice. Above is my favorite combo and also the one that I used on this card.
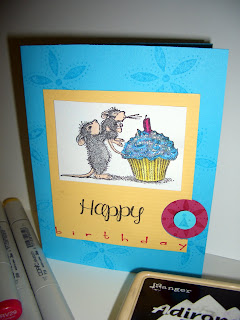
And of course the finished card.
Ingredients: Tempting Turquoise SU! paper and ink, Rose Red paper and ink SU!, House Mouse Stamps, SU! stamps, EK Sucess Stamps.
Thanks for reading! I am new to this so all criticism and comments are appreciated :) I promise to improve the quality of pics next time!
Ingredients: Tempting Turquoise SU! paper and ink, Rose Red paper and ink SU!, House Mouse Stamps, SU! stamps, EK Sucess Stamps.
Thanks for reading! I am new to this so all criticism and comments are appreciated :) I promise to improve the quality of pics next time!


20 comments:
I have debating on whether or not to invest in copics. Thanks for the step by step on your coloring. YOu did an excellent job coloring it and I love house mouse images
gorgeous!
What a great tutorial. Can't wait to see your trick for your 'mistake'. TFS!
This is a beautiful card and I really like the step by step photos! :)
What a cute card! House Mouse stamsp are so great to work with. I think I know what your trick is, ;) but I'll be sure to check back tomorrow to see for sure!
Congratulations on your blog! It looks great! :)
Your card is adorable, and your blog looks great too! Have fun with it!! :D
great tutorial can't wait to see more
Thanks for the tutorial - that is an adorable card and I can't wait to see how you fix the mistake, too! I make lots of them.
Very nice tutorial. I don't have the copics yet. I love HM stamps though...usually I use chalks for coloring them.
Good luck on your blog. You're off to a great start!
Jane
Dontcha just love those HM stamps? LOL....great tut, great colors.
Wow ! Talk about talent ! Great tutorial.
You mentioned trying to balance lots at once, I just bought a tripod and it was about $35. I love it ! I put the camera in position and take the shot using the "timer" mode. That way there is absoluetly no blurry pictures (my hands shake a bit sometimes).
You did good!!! :)
No negatives from me :)
Awesome card!!
Terrific job...welcome to blogoland!
What a wonderful card. Love your coloring. You have a great start to your blog...love it!
cute card....great coloring job with the copics...they are so much fun to use!
Great job showing how to use the copics---great pictures!
WOW too cute.
Love those little guys.
That cupcake looks yummy enough to eat. Your coloring is fabulous!
Post a Comment